time machine nas setup
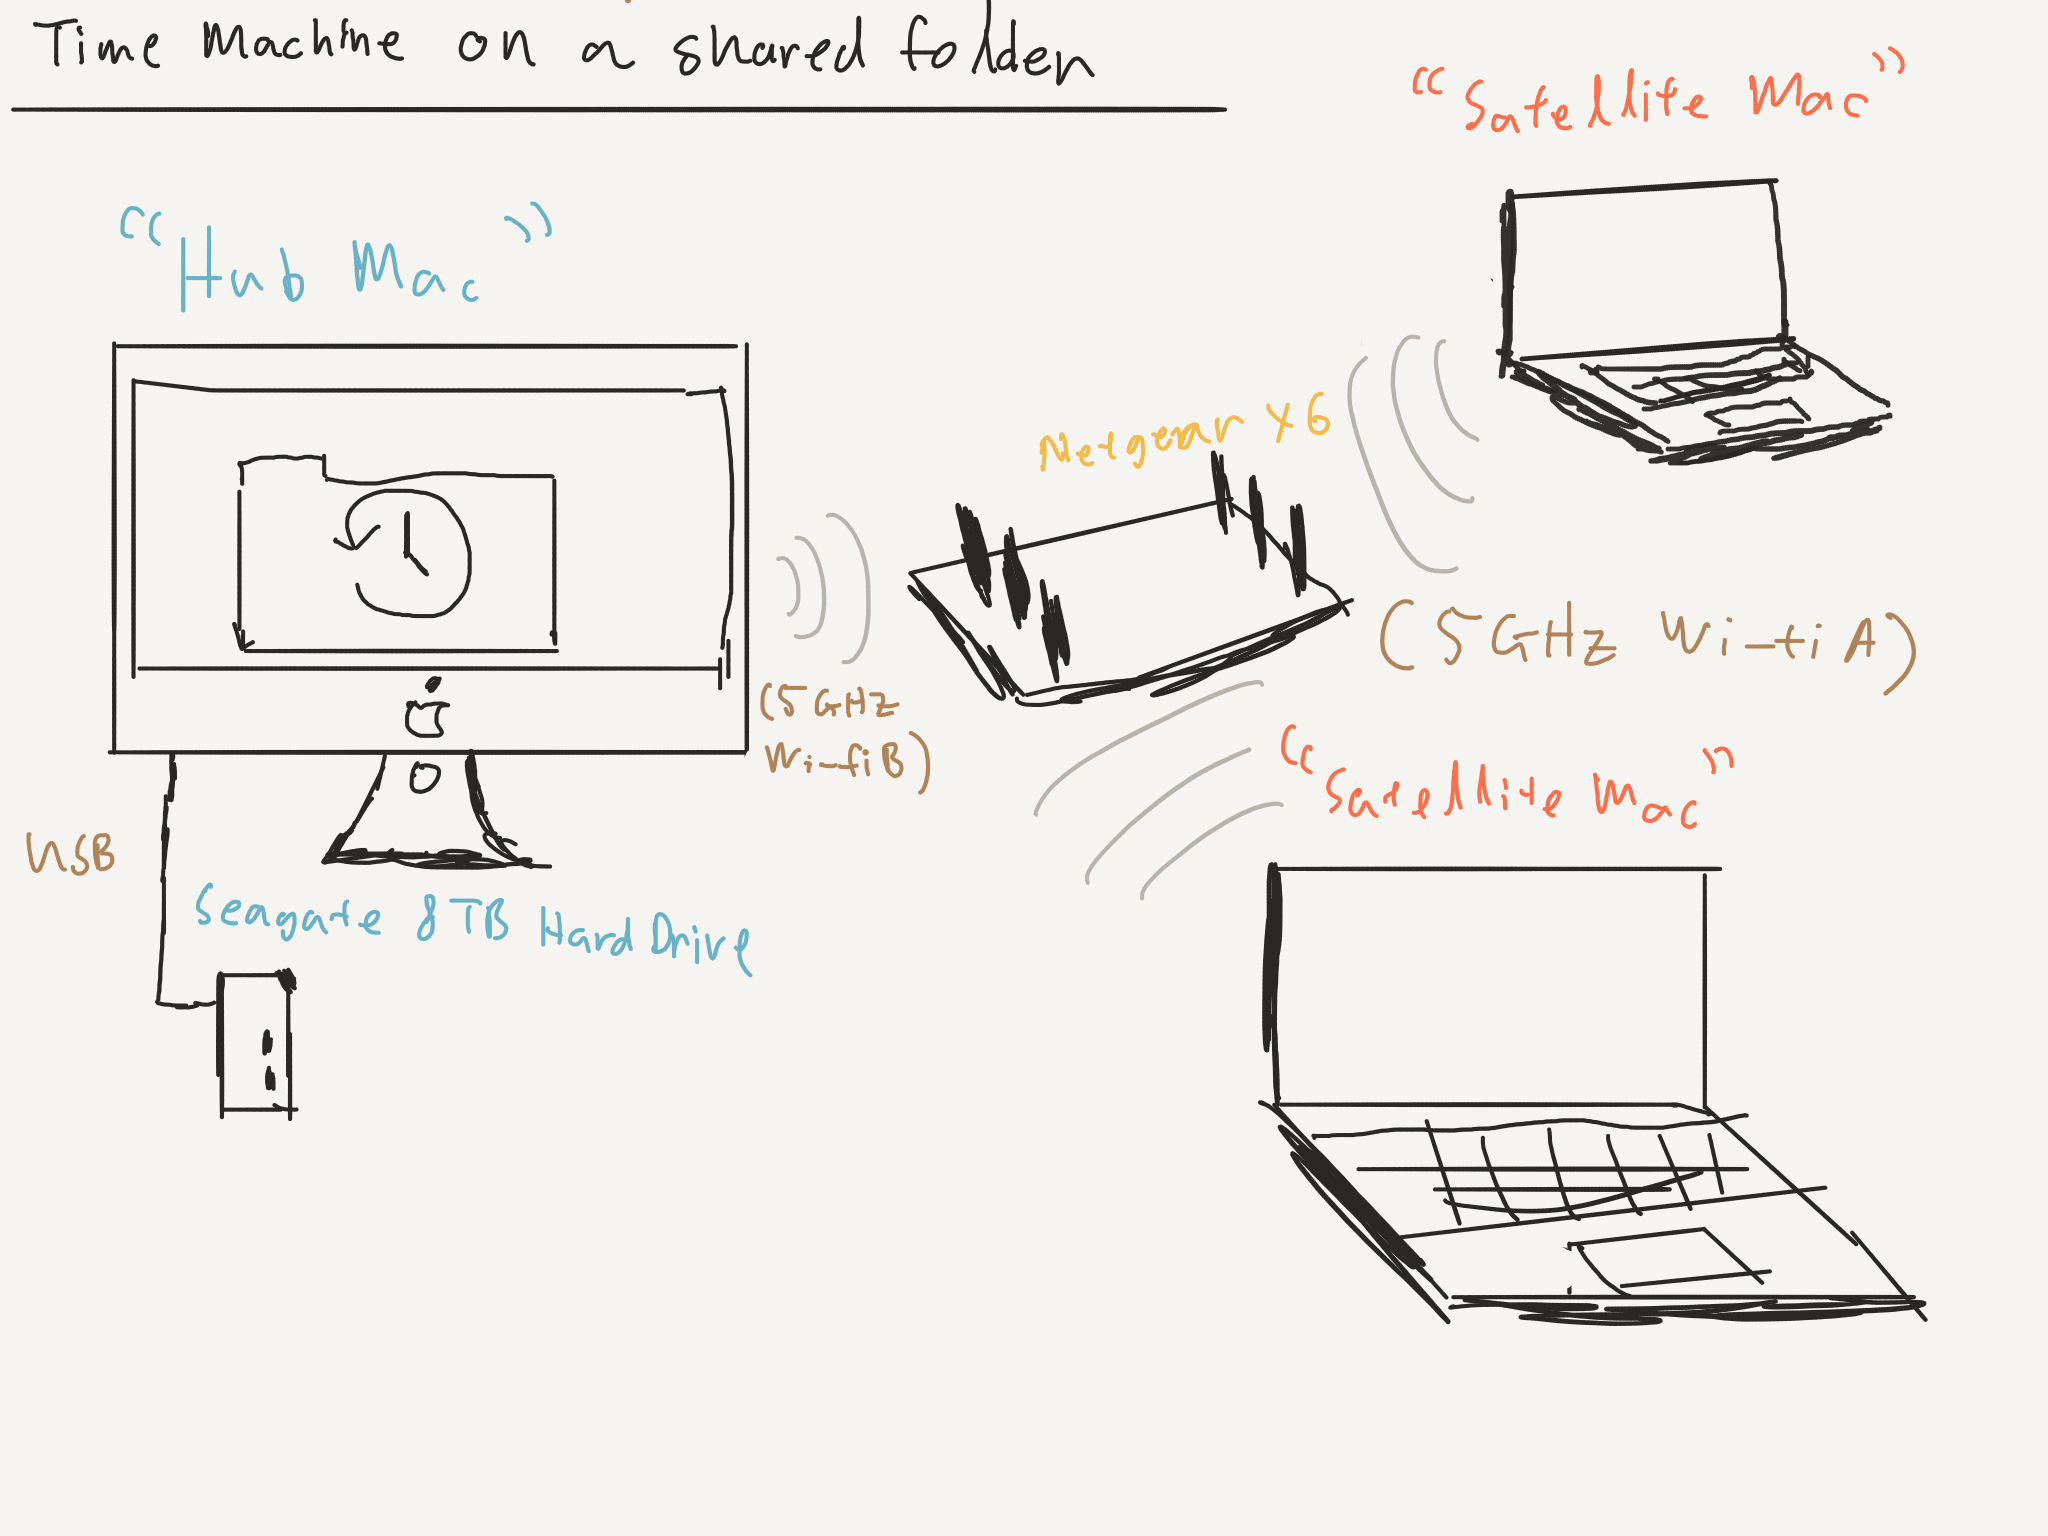
Place it on the network share you want to use. I have a NAS setup and I just installed a 2nd drive there specifically for backups.
How To Set Up A Shared Time Machine Backup Drive In Macos High Sierra Nk
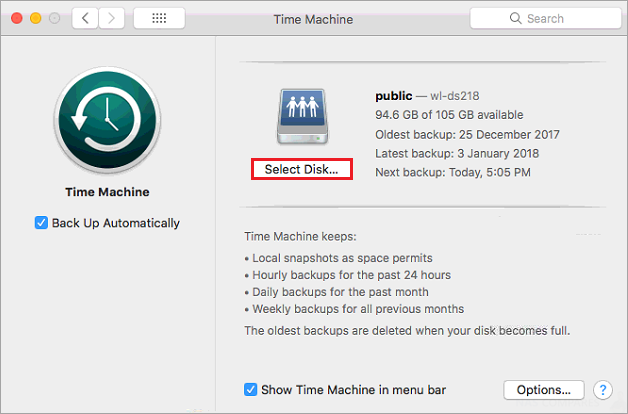
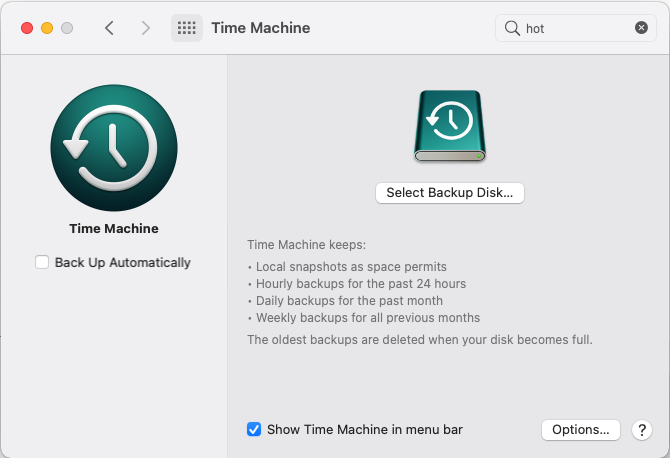
Open Time Machine preferences from the Time Machine menu in the menu bar.
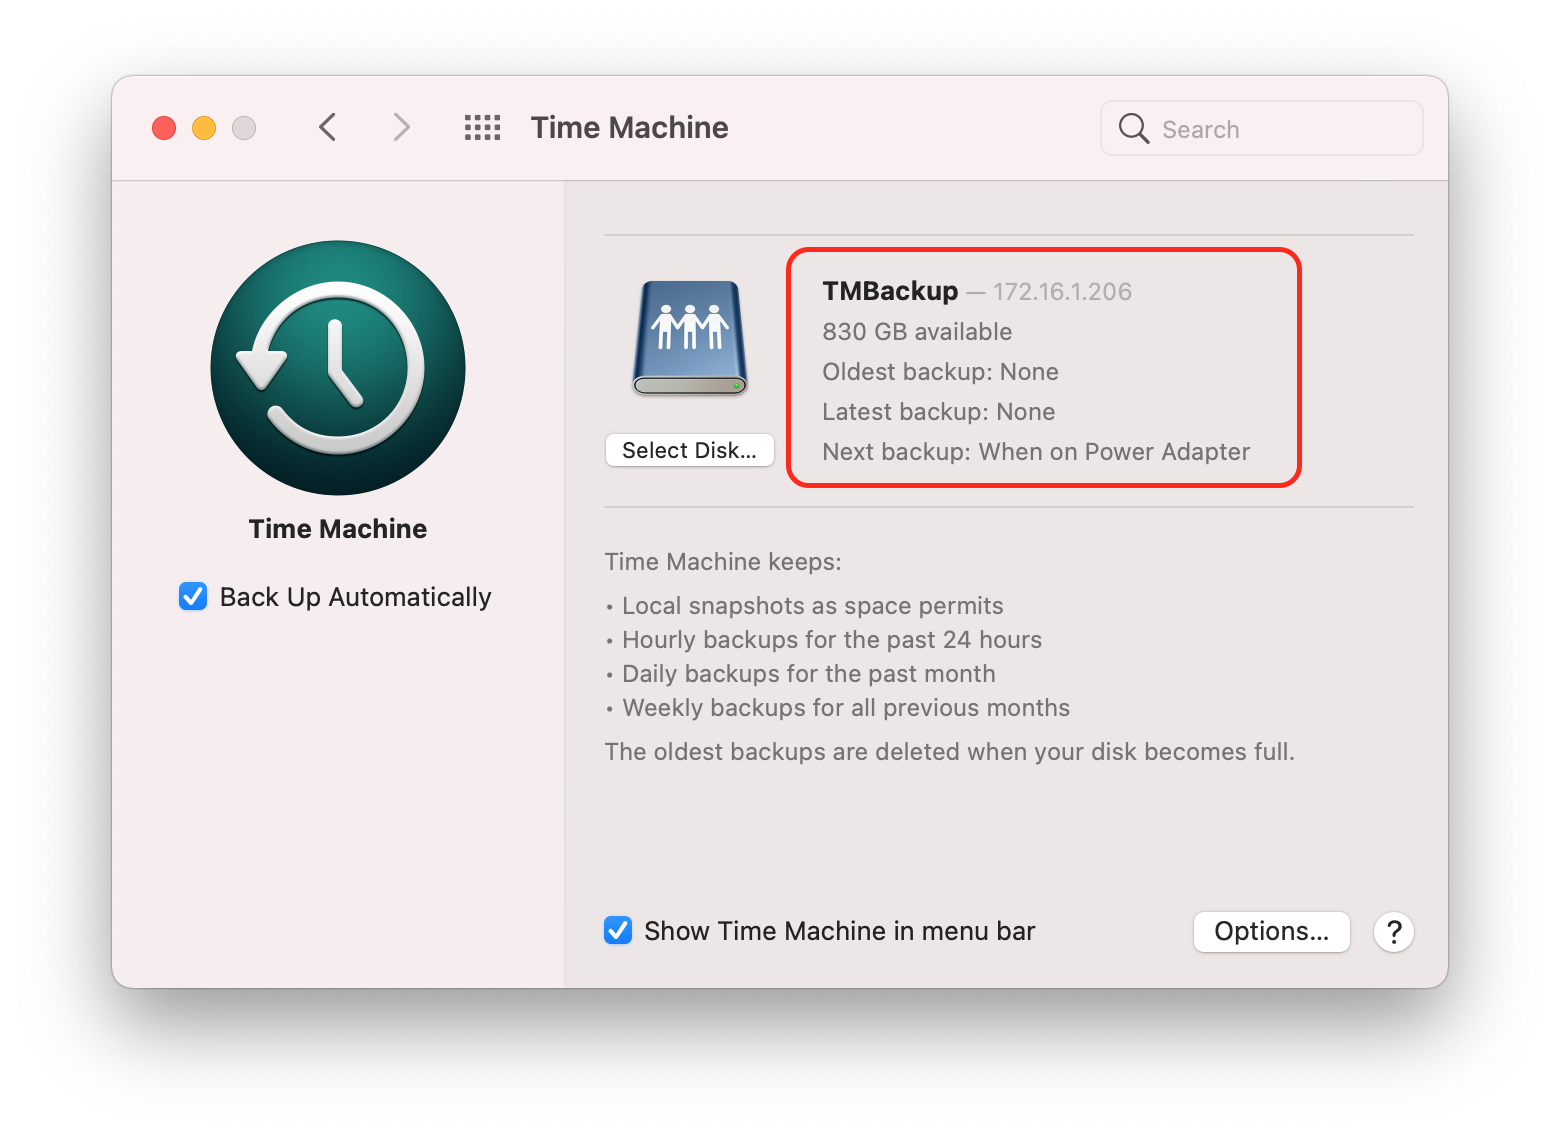
. For instance not all NAS drives will allow you to use Time Machine to make backups over the network so support for Time Machine is a key feature that you should check on when thinking about. Choose the shared folder that you just created from the Time Machine menu and save your settings. How to enable Time Machine backups on your Mac.
Set up Time Machine on a NAS in three easy steps Authored by. Connect the drive directly to your Mac then use Disk Utility to erase it. From your System Preferences menu on your Mac you start up Time Machine.
Click on the Enable Time Machine box. Hit the SAVE button to save the configuration. Make sure the size is sufficient for your backup.
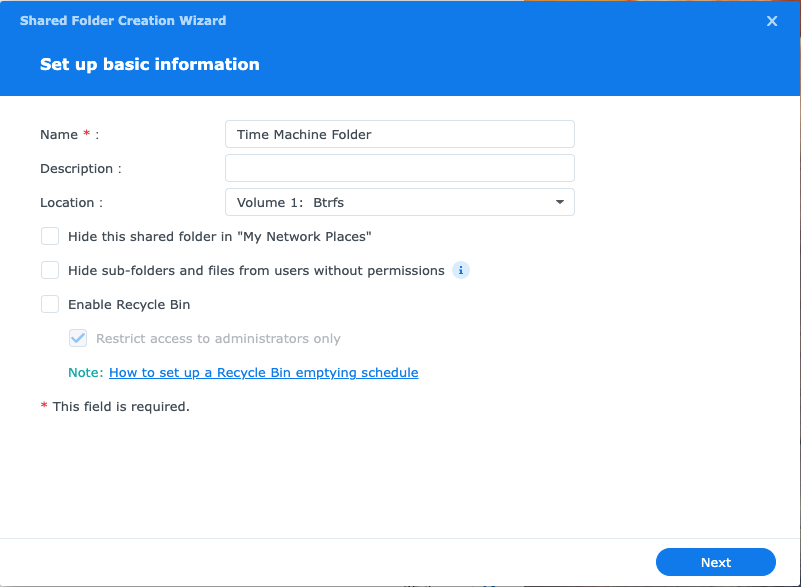
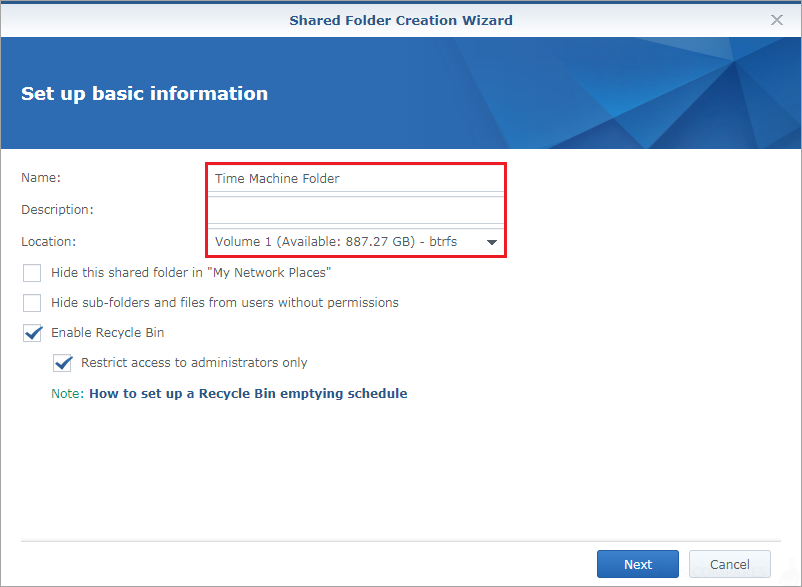
Set up a Synology DiskStation to Support Time Machine. TrueNAS will see there is already a dataset with your username and serve that up. You create a shared folder on your NAS exclusively for the backups next you create a user account on your NAS exclusively for the backups.
Doublelibra on Jan 26 10 122320PM I have a theoretical question about all this. Step 1. From Settings click the slide switch to enable Time Machine.
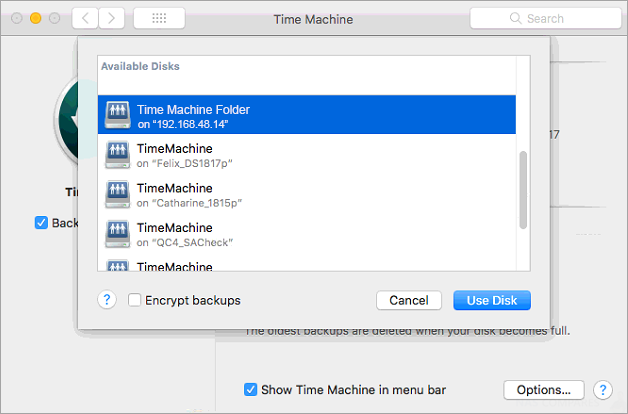
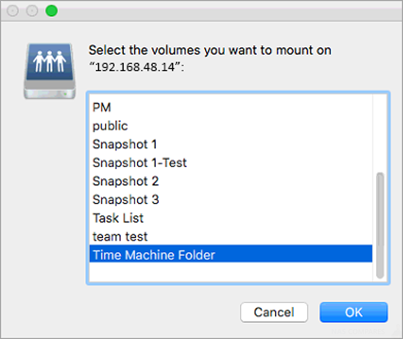
Click on the Time Machine share that was created earlier. Setting up a Time Machine backup to your Synology DiskStation involves several steps on both the NAS and the Mac. Apple Time Machine and Synology NAS Guide.
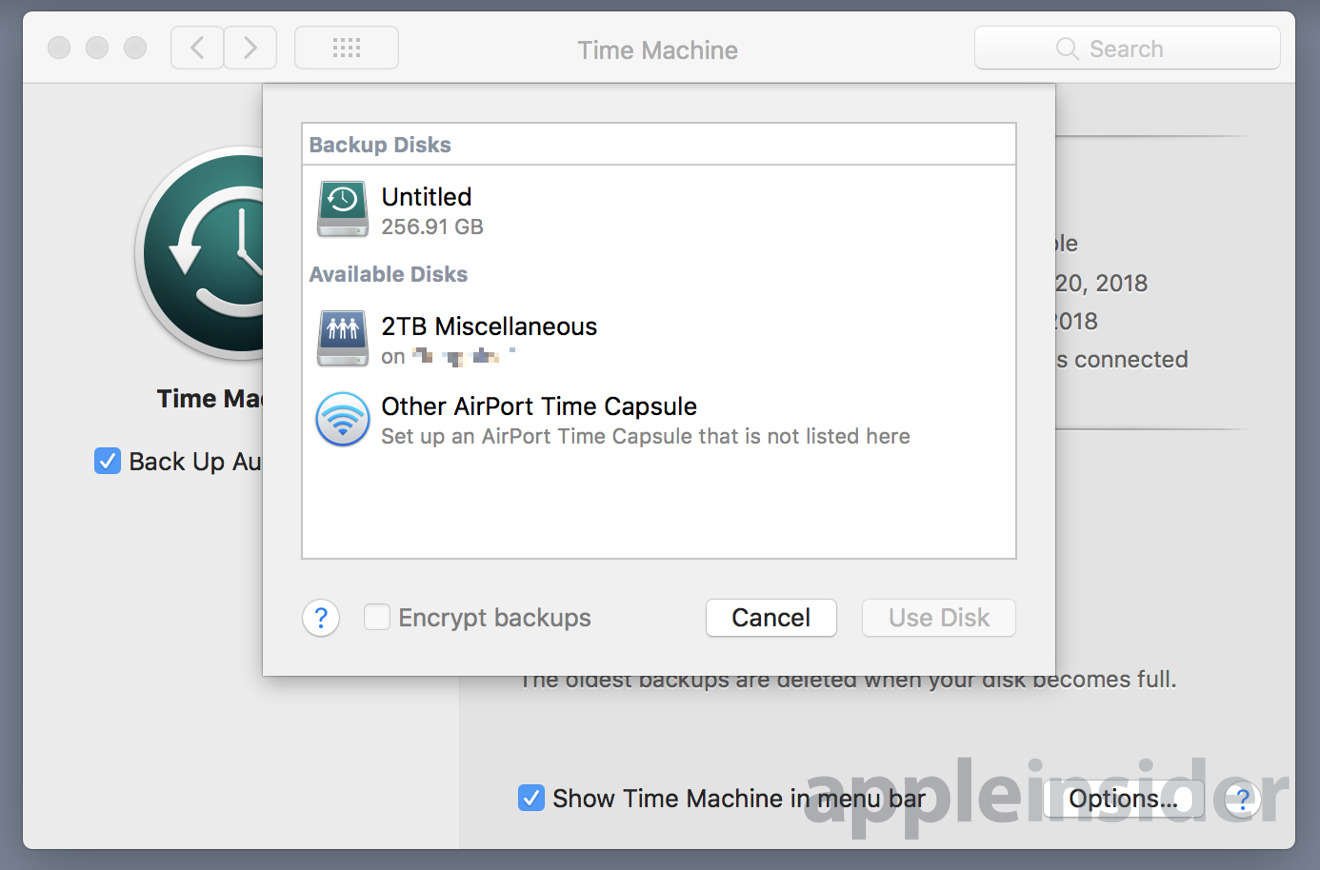
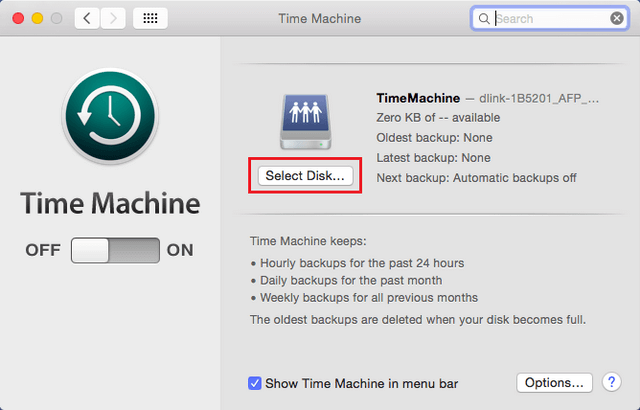
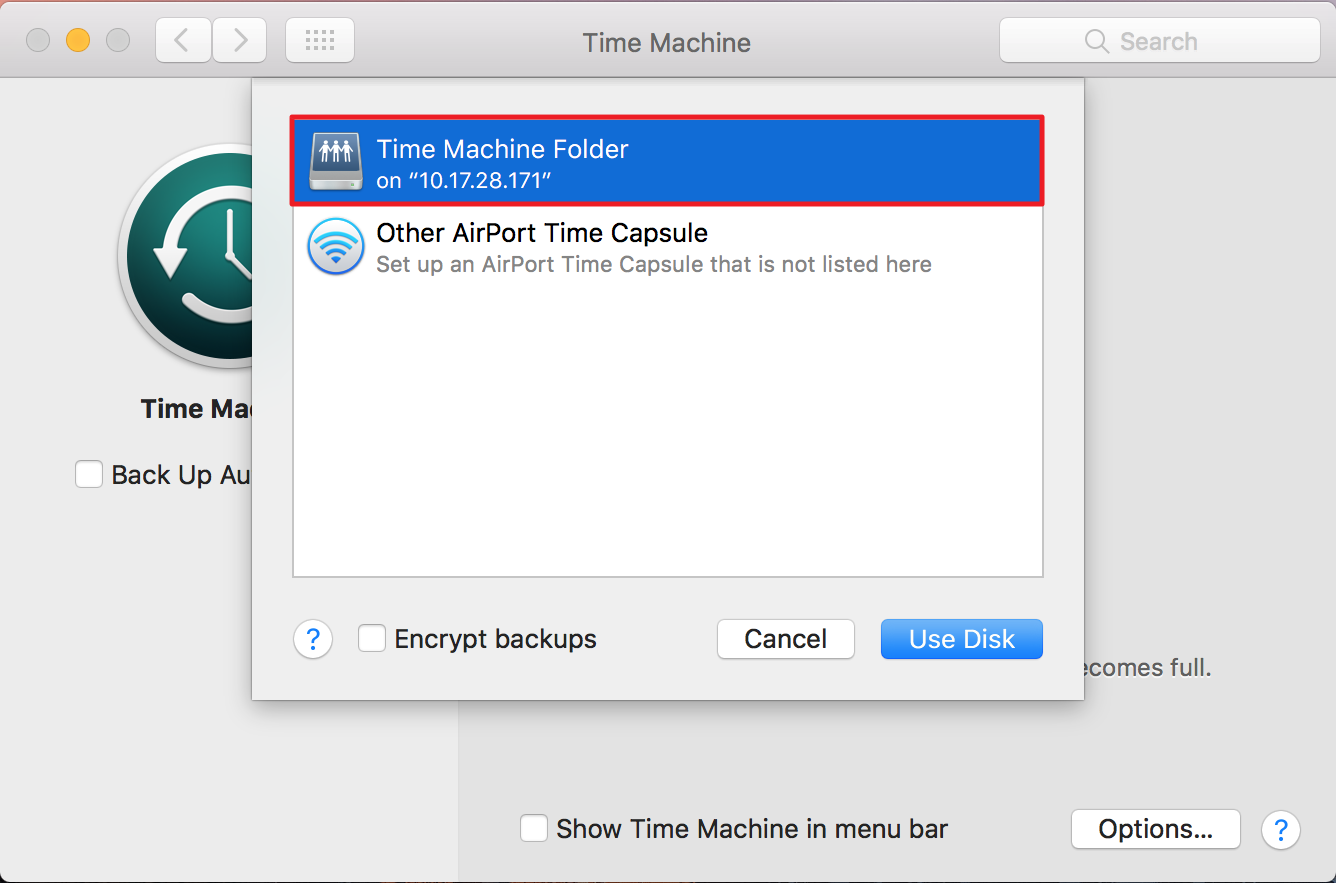
Select which disk youd like to use as a Time Machine backup. Next and last step is to configure the Mac to use this share as Time Machine. From the Mac desktop click on Go from the menu bar and select Applications.
It should turn blue. This is very important for the share to act as Time Machine. This is a quick tutorial on to how to set your Synology as a Time Machine Destination.
Select the name of your disk then click Use Disk. You will need this later. The parent folder of the Time Machine dataset in my case mntNewPool Connect to the new share from macOS.
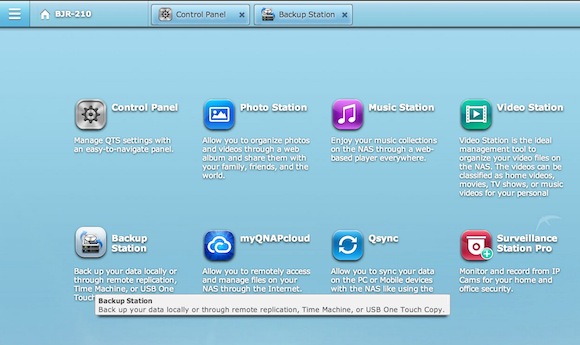
For that launch the Automator App and build this simple workflow. You create a shared folder on your NAS exclusively for the backups next you create a. Once Inside choose Time Machine in the left hand menu.
Then click on the Set Time Machine Folders button. Using WD Elements for Time Machine Overview Here is a top level view of what youre going to do. This guide assumes you have Synology NAS with Docker will most likely work just as well with QNap and Docker as well as Qbittorrent or equivalent.
If the big button for Time Machine is off turn it to On. Automate mounting the SMB share and Time Machine image Next comes the magic we need to automate connecting to the share and mounting the Time Machine bundle in the background. On the NAS you take the following steps.
Fill out the Name field with Time Machine without quotes and enter and confirm a desired password. Open the Terminal application space to open Spotlight or click op the magnifying glass in the upper right corner and type Terminal For those new to this funny blinking cursor do not be afraid - Youll see something like this. Go to Storage - Pools and click the 3 dots next to your main pool or the pool that you want to use to hold the TM backups.
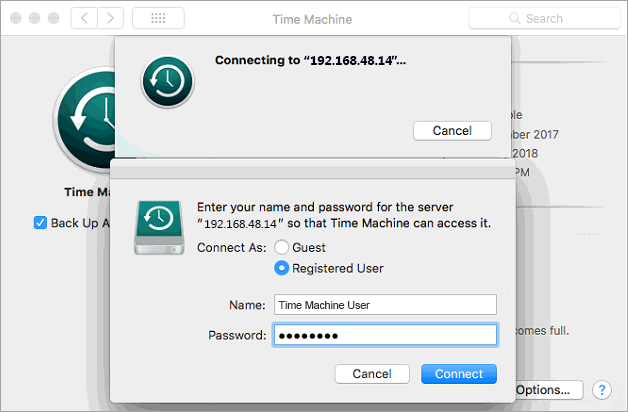
Add a new SMB share with. Enter the login information. I have 2 macs a MBP an iMac.
Go to Accounts - Users and create a user account to use for Time Machine backups. On the assign shared folders permissions page. On the NAS you take the following steps.
Click on Select Backup Disk. Setting up the SMB Time Machine share. Click next on the join groups page.
This article will guide you through the process of backing up data from your Mac OS X computer to a Synology DiskStation using Apples Time Machine a backup utility included in Mac OS X 105 and later. Select your WD Elements drive as your Time Machine backup drive. Time Machine immediately begins making periodic backupsautomatically and without further action by you.
Or choose Apple menu System Preferences then click Time Machine. On the Mac open the System Preferences and click Time Machine. QBitorrent must be downloading to a.
Perform Time Machine Backup to your Synology NAS. I followed instructions for creating a sparsebundle disk image on the NAS. In macOS you will see your old backup.
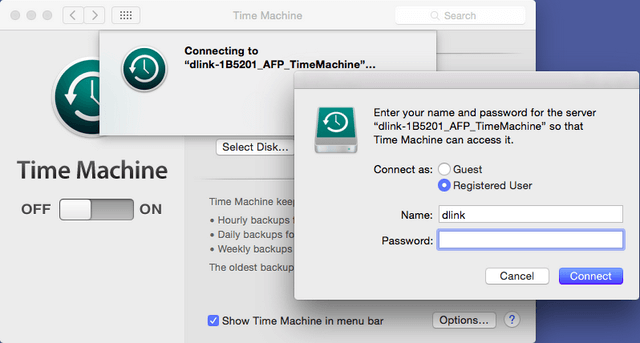
Select System Preferences from the Apple menu. Enter your preferred password in the Password box. Setting up a Time Machine backup to your Synology DiskStation involves several steps on both the NAS and the Mac.
Take note of the TMBackup display name and TimeMachine username. Setup TimeMachine on your QNAP NAS 1. Choose the Time Machine icon.
Click Select Backup Disk. Click Select Backup Disk. Just leave everything other than full name username and password as default.
Select the ReadyNAS for Time Machine disk Bring up Time Machine on you Mac and click on Change Disk. I set user quota at 4TB but Time Machine preferences on Mac shows that I have a 45TB available. Go to the Advanced tab and tick the Enable Bonjour Time Machine broadcast via SMB or Enable Bonjour Time Machine broadcast via AFP checkbox.
Set up Time Machine with Synology for the first time. Youll see the ReadyNAS in the available list. External drive connected to an AirPort Extreme Base Station 80211ac or AirPort Time Capsule.
This is different from your user password since the Time Machine Backup is its own user. Connect the drive to a USB port on your AirPort base station then. Open Control Panel User Create to open the User Creation Wizard.
This ends step 4 and also the configuration on the FreeNAS side. Time Machine is a built-in Mac Program that backs up your entire c. Go to the BackupTime Machine tab select the checkbox enter a password for the Time Machine user ReadyNAS and the capacity that you wish to limit Time Machine to.
For this example my TM backup user is called TimeMachine.
How Do I Setup Time Machine On Dns And Mac Os X D Link Uk
Guide To Synology Nas With Time Machine Nas Compares
Using Nas With Apple Macos Asustor Nas
How To Use An Unsupported Nas Or A Spare Mac On Your Network As Storage For Time Machine Backups Appleinsider
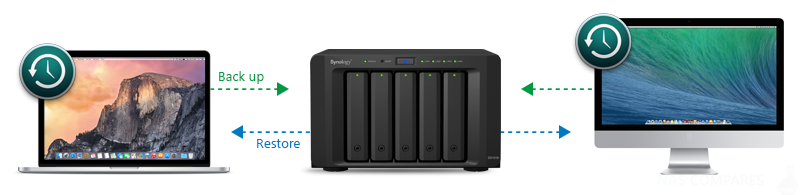
How Do I Back Up Files From My Mac To Synology Nas Using Time Machine Synology Tudaskozpont
Guide To Synology Nas With Time Machine Nas Compares

How To Set Up A Time Machine Backup On A Mac
Guide To Synology Nas With Time Machine Nas Compares
How To Back Up Your Mac To Synology Nas With Time Machine Nas Compares
How Do I Setup Time Machine On Dns And Mac Os X D Link Uk
Guide To Synology Nas With Time Machine Nas Compares
Time Machine Setup Qnap Advanced Support
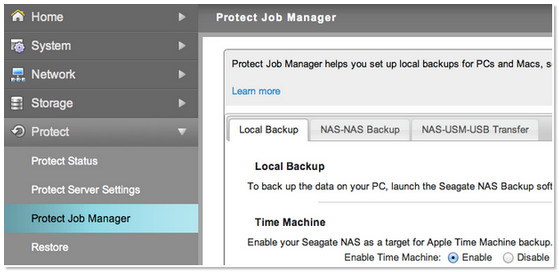
Business Storage Nas How To Back Up With Time Machine Backup Seagate Support Us
Synology 101 Set Up Apple Time Machine Backup

How Do I Back Up Files From My Mac To Synology Nas Using Time Machine Synology Tudaskozpont
Guide To Synology Nas With Time Machine Nas Compares
How Do I Back Up Files From My Mac To Synology Nas Using Time Machine Synology Tudaskozpont
Guide To Synology Nas With Time Machine Nas Compares
What Should I Do To Fix The Problem When Connecting To Synology Nas Using Time Machine Synology Knowledge Center